I figured I could whip something basic up from my felt stash and luckily I had just enough red. Here is what you need:
1 Black Shirt
2 (approx) sheets of felt in each red and white.
hot glue
1 headband
needle and thread

I cut an oval from the first sheet of white felt. It took almost the whole sheet.

Then I did a (very) rough stitch around the edge. I should note that I am planning on dismantling the shirt after the fact so if you want a permanent costume you would probably want to use a sewing machine.

I didn't have a whole sheet of red so if you use the whole sheet you would end up with a bigger bow. I did and accordion fold and some pinching to get it how I wanted it and then used hot glue and put a few dots of glue to hold together the folds.

Then use a long strip, around 12 inches long. About the length of a regular sheet of felt. Then cut it to look like this. Not the little notch in the top. That is from a previous project.

Wrap the long piece around to cover the glue in the middle and make it look like a tied bow. Then hot glue it in the back to hold the long strip in place.

Then I sewed it (roughly) to the top of the shirt.

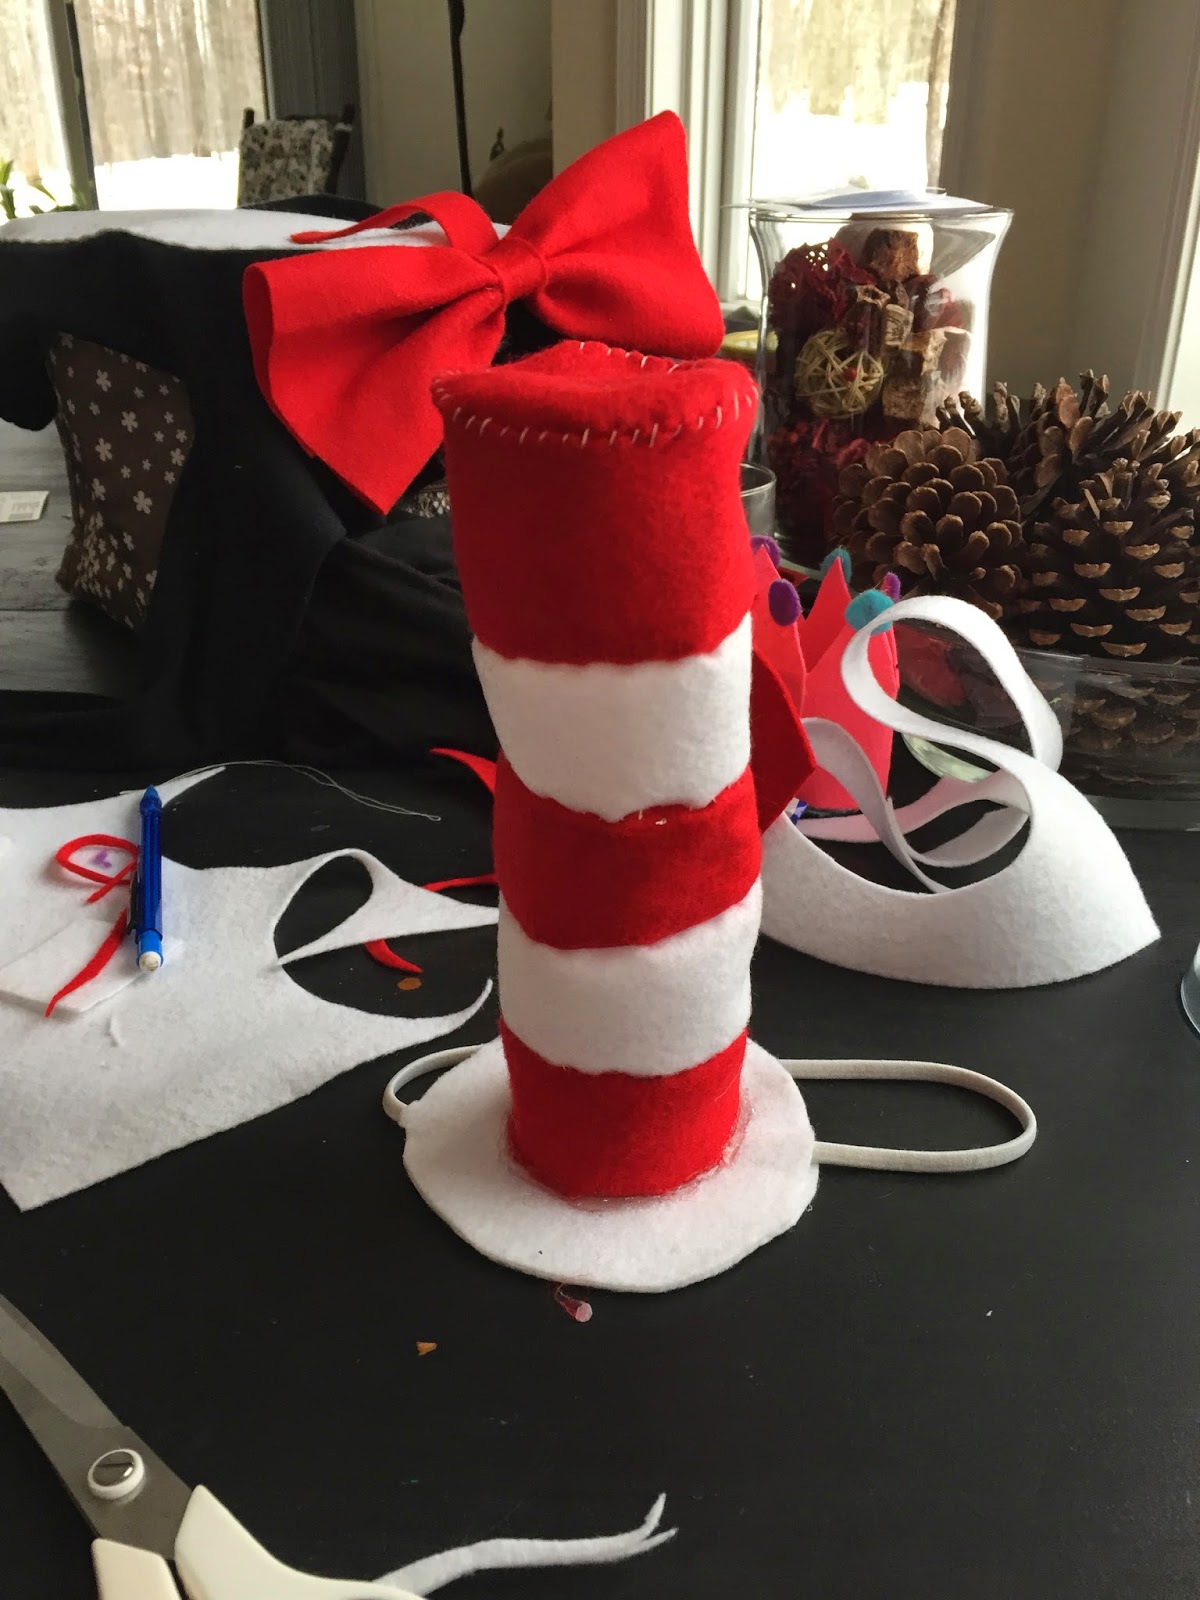
On to the hat! Use a large mouth glass to trace a circle. Cut out two.

Sandwich the headband between the two circles and glue around the edge not leave a gap for the headband so you can adjust the hat once it's on your head.

For traditional Cat in the Hat you have a white brim and then 2 white and 3 red stripes.

Rough stitch them together alternating red and white.

Then sew it into a tube by sewing up the side.

Cut out a red circle and sew it to the top of your tube. Then turn the whole thing right side out.

I then glued the tube to the white base. This can be tricky but it will work. It would probably be easier if you stuffed your tube with a filler of some kind so it would be a bit more stiff. Hindsight.
The Cat in the Hat.

No comments:
Post a Comment